How to Migrate from Presto Player to FluentPlayer in a Single Click
If you want to migrate from Presto Player to FluentPlayer without rebuilding your video library from scratch, you don’t have to start over. FluentPlayer has a built-in migration tool that pulls your presets, media, and settings directly from Presto Player. You choose exactly what transfers. Your Presto Player data stays untouched.
TL;DR
- FluentPlayer’s migration tool transfers four things from Presto Player: global settings, presets, media, and analytics.
- You can select specific presets and specific media items rather than importing everything at once.
- Analytics is only available to import after you select media first.
- Popup blocks, private media, and watermark settings cannot be migrated from Presto Player.
- Running the migration again overwrites previously imported data by default.
Why Switch from Presto Player to FluentPlayer
It’s not about one missing feature
Presto Player is a capable plugin. If you’re using it, you already know what it does well. The reason most people test FluentPlayer isn’t a single gap in Presto Player’s feature list.
It’s about what sits next to the player.
FluentPlayer plugs into a product suite Presto Player can’t match
FluentPlayer is built by WPManageNinja, the same team behind FluentCRM, Fluent Forms, and FluentCommunity. Those are not third-party API connections. They share the same codebase and run inside the same WordPress dashboard.
If your site uses FluentCRM for email automations, Fluent Forms for lead capture, or FluentCommunity for your member area, FluentPlayer sits inside that stack without any additional setup. Presto Player doesn’t connect to any of those natively.
For anyone running a course site, a membership site, or a WordPress setup built around the WPManageNinja suite, that difference is real.
FluentPlayer vs Presto Player – Find which one fits you the best
What Transfers When You Migrate from Presto Player
What you can import
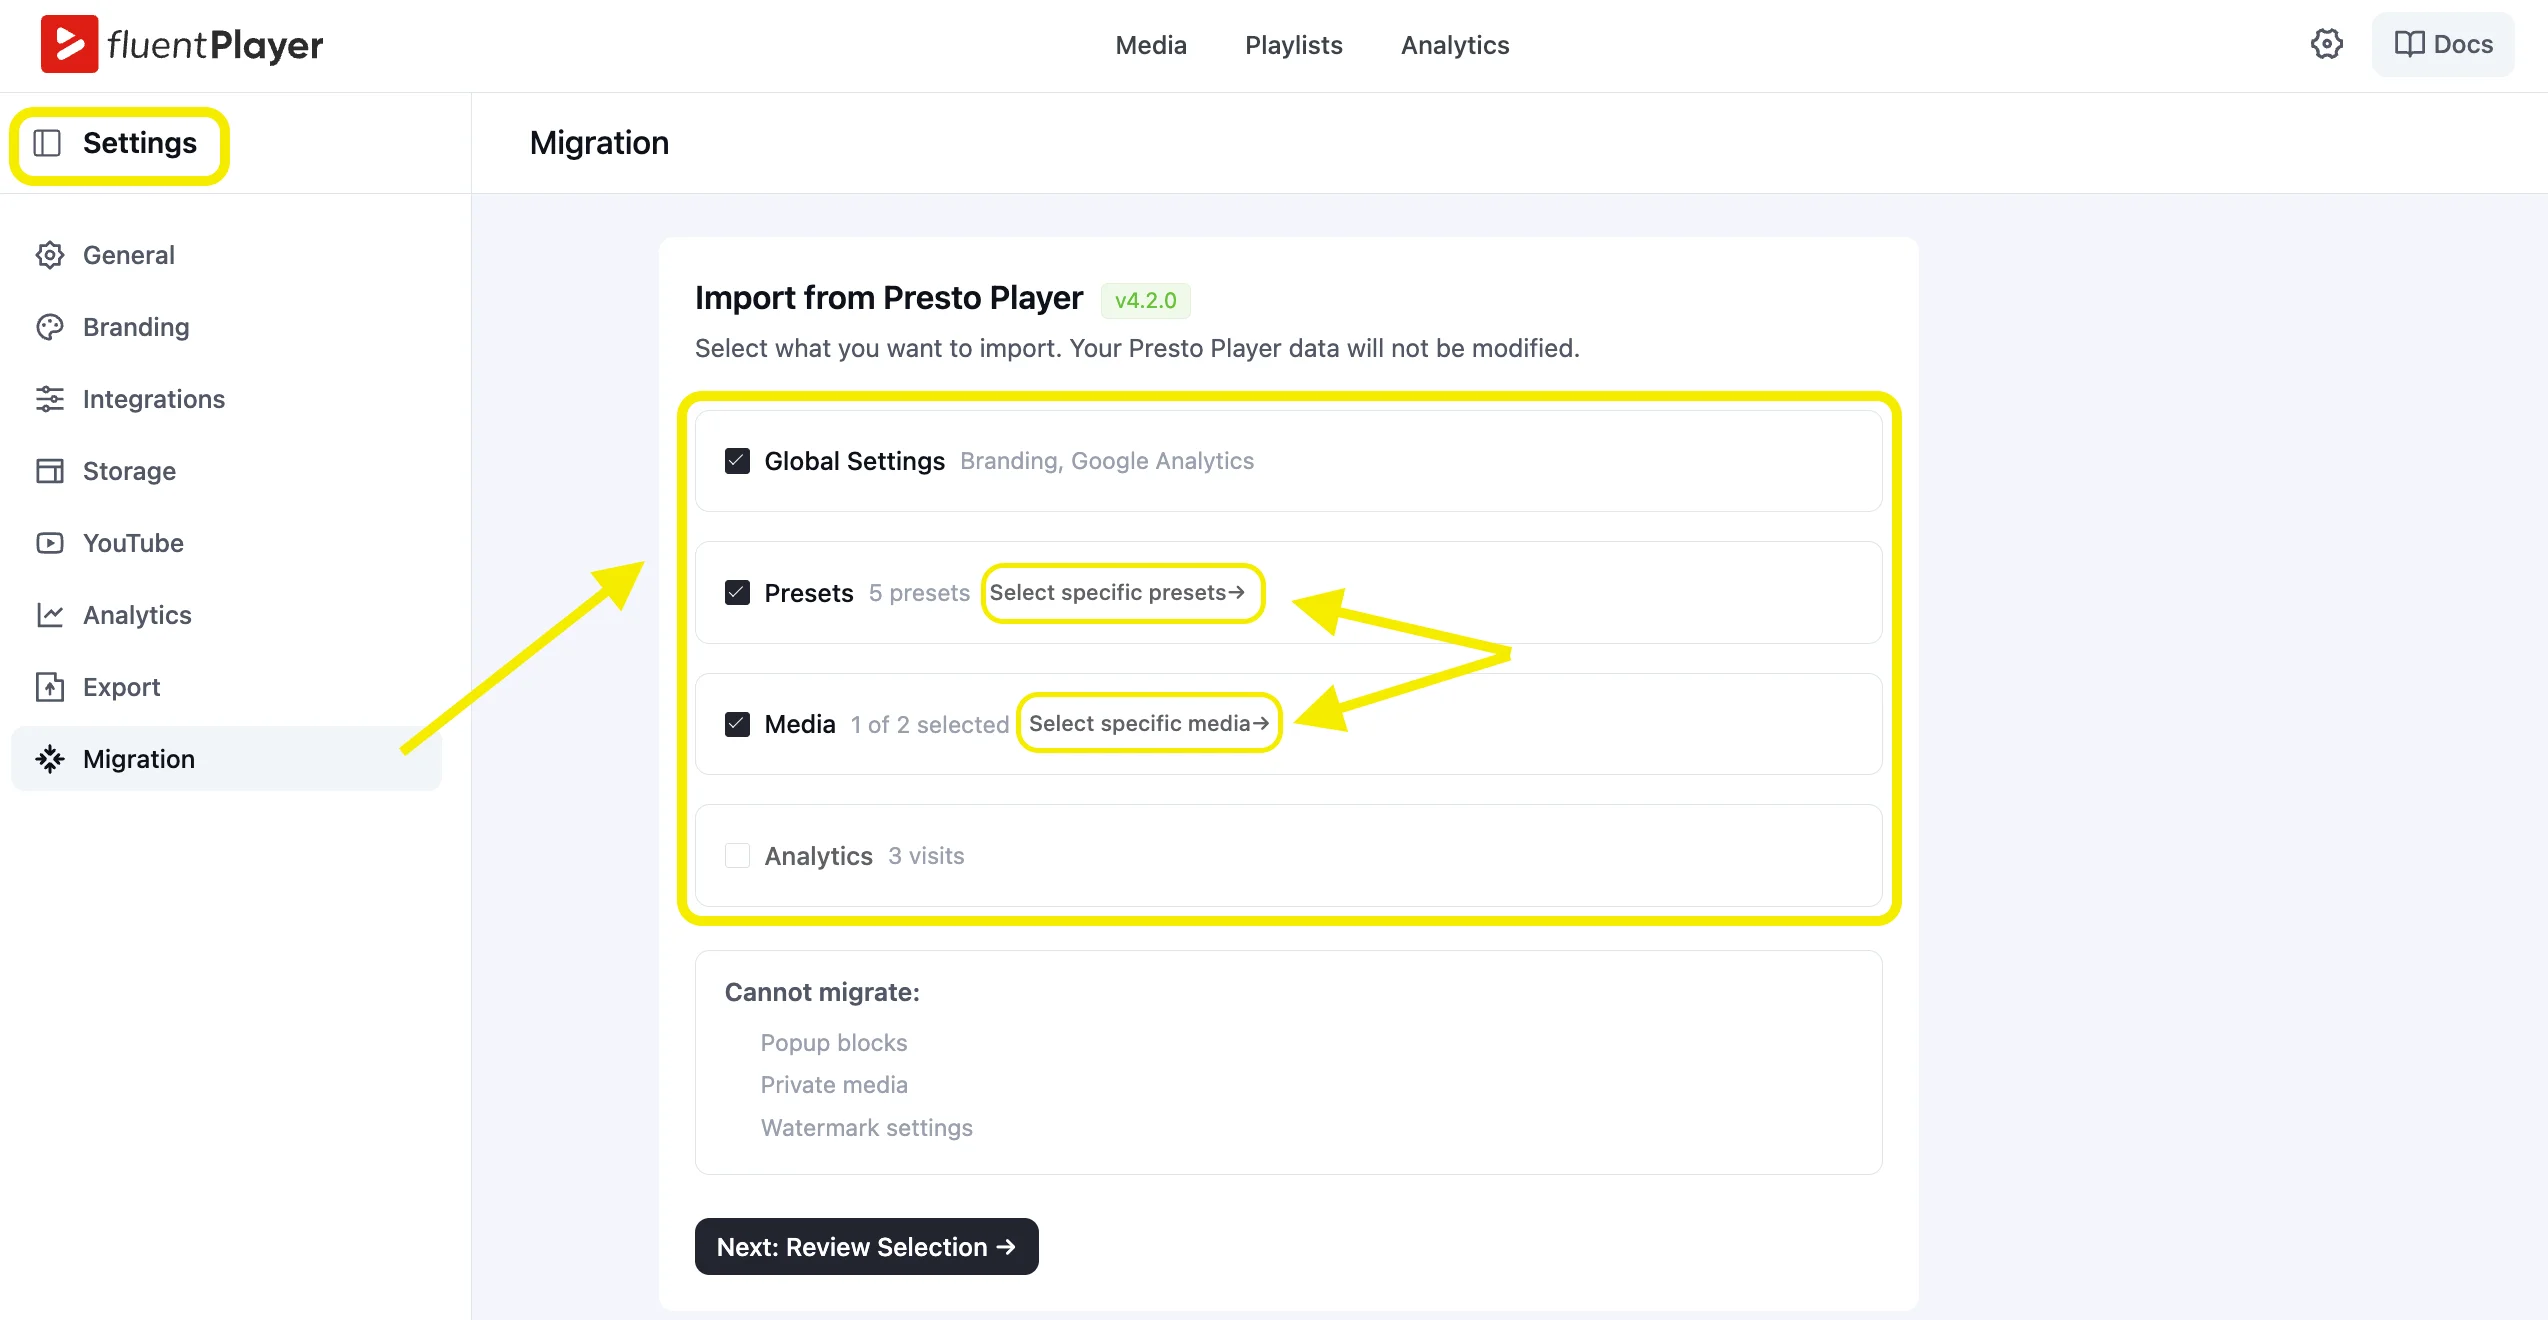
The migration tool gives you four import options:
- Global Settings — Your branding and Google Analytics configuration
- Presets — All player presets from your Presto Player account
- Media — Your video and audio items
- Analytics — Visit data tied to your media
Global Settings and Presets are selected by default. Media and Analytics are not. You have to actively check them.
Presets and media: choose exactly what comes over
You don’t have to import everything. Both presets and media support item-level selection.
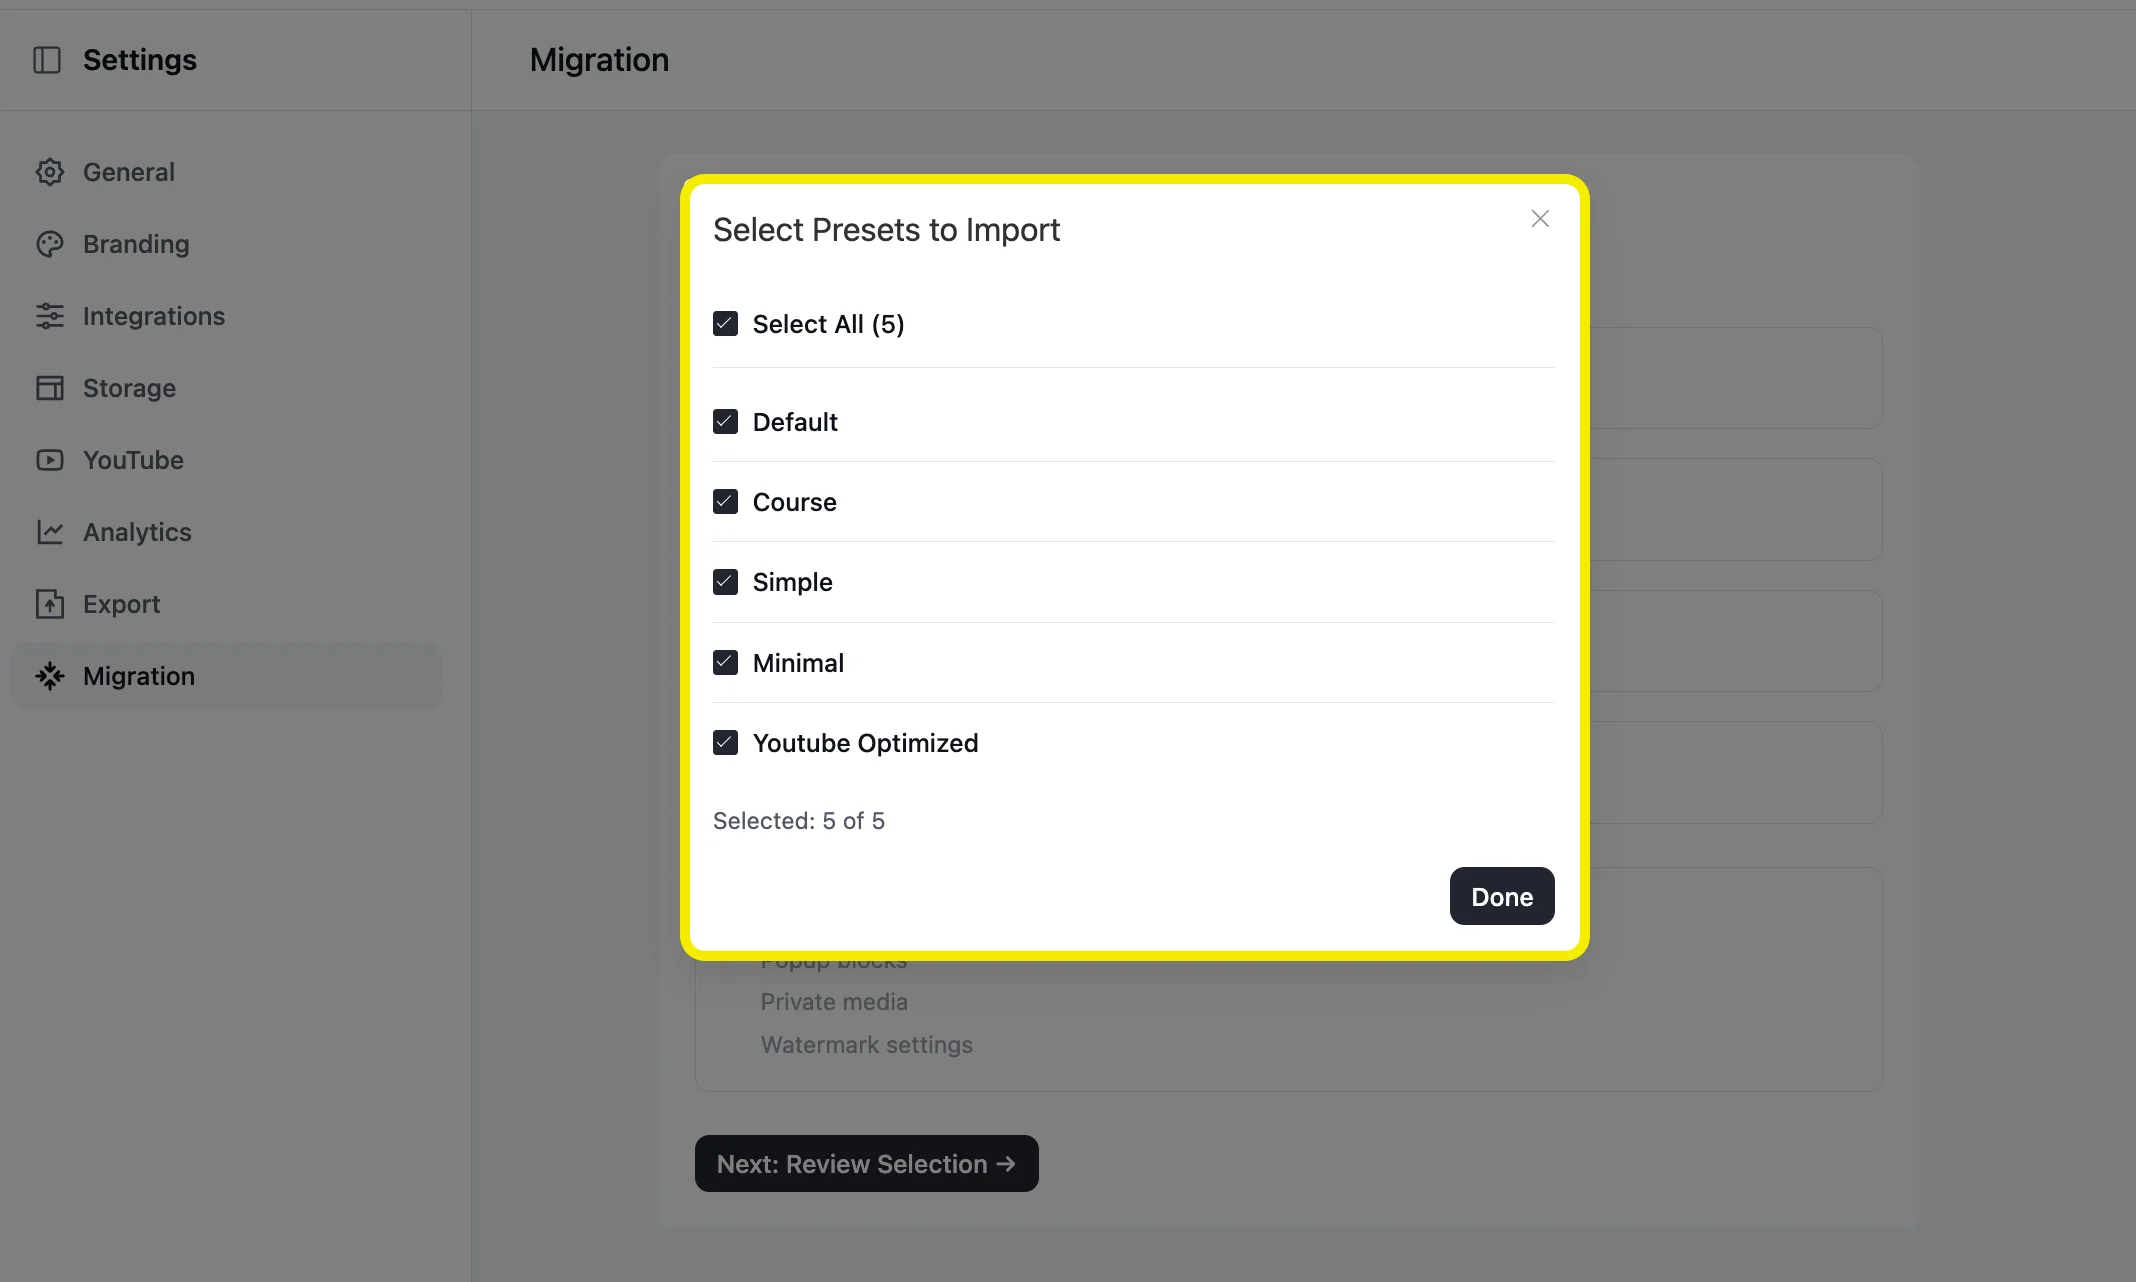
For presets, clicking “Select specific presets” opens a modal with all 5 options from your Presto Player account:
- Default
- Course
- Simple
- Minimal
- Youtube Optimized
Check the ones you want, then click Done.
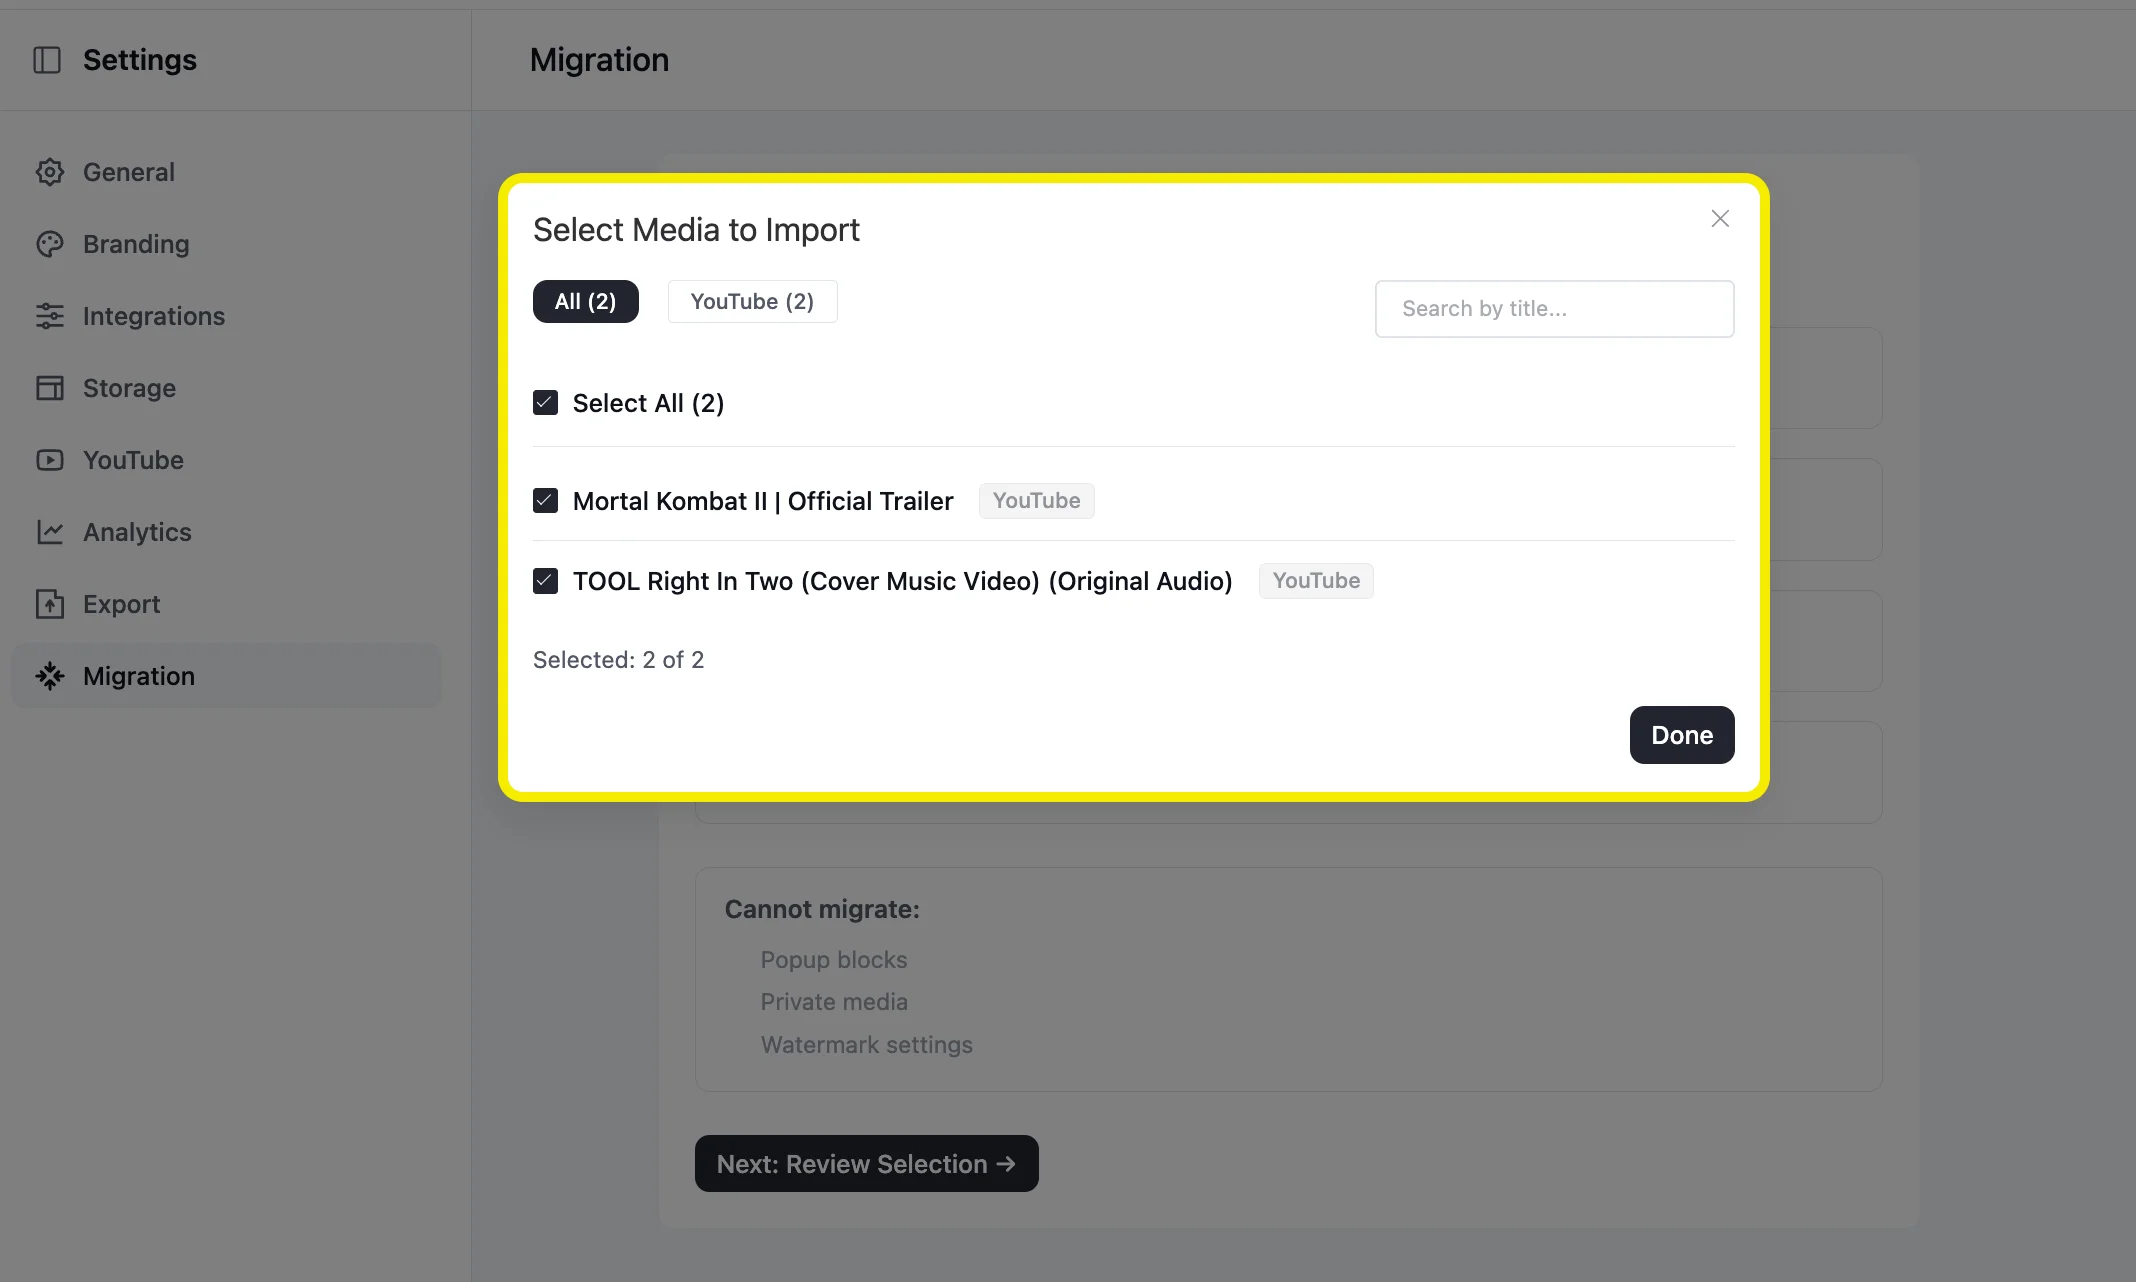
For media, clicking “Select specific media” lets you pick individual items. This is useful if you’re testing FluentPlayer before committing. Import one video, compare the experience, then run a full import later.
Why analytics requires media
Analytics data in Presto Player is tied to specific media items. FluentPlayer needs those media items present before it can attach visit data to them.
Select media first. Analytics becomes available automatically after that.
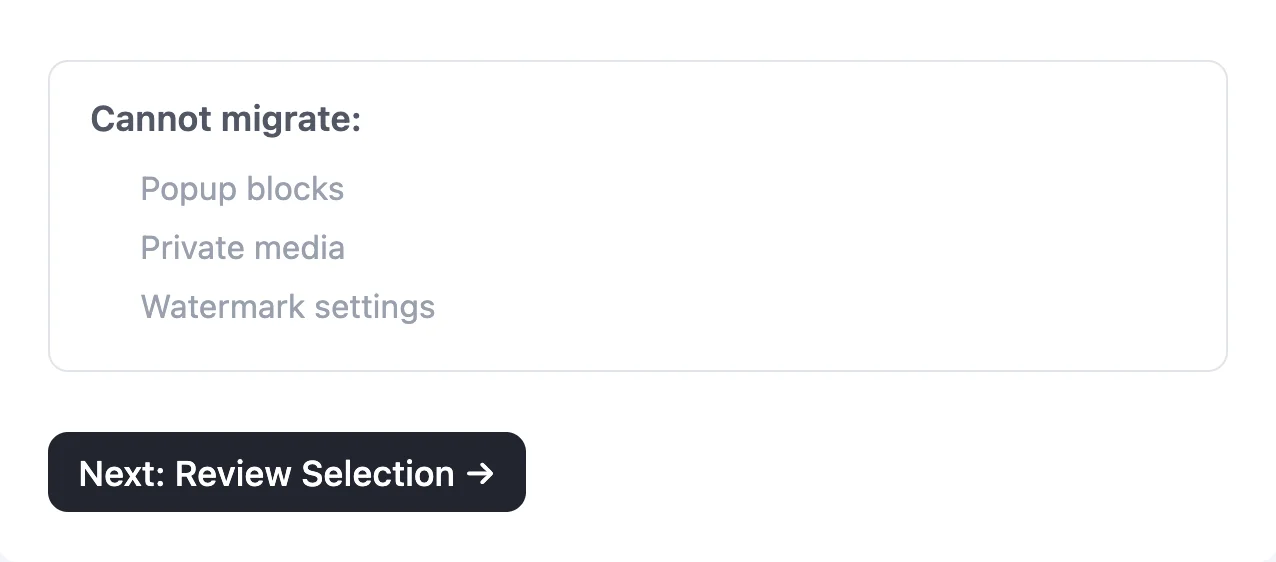
What cannot migrate
Three items cannot be migrated from Presto Player to FluentPlayer:
- Popup blocks
- Private media
- Watermark settings
Private media has no migration path from WPManageNinja’s side right now. Those files need to be re-uploaded manually inside FluentPlayer. Popup blocks and watermark settings need to be recreated in FluentPlayer directly.
Stay updated on free vs. pro, pricing & beta.
How to Migrate from Presto Player to FluentPlayer
Step 1: Install both plugins on the same WordPress site
You need both plugins active on the same site for the migration to work. You can run Presto Player and FluentPlayer simultaneously with no conflicts. Installing FluentPlayer does not affect your Presto Player setup in any way.
Step 2: Open the Migration tab in FluentPlayer settings
Go to your WordPress dashboard, click FluentPlayer Pro in the left sidebar, then go to Settings > Migration. You’ll see an Import from Presto Player panel showing which version of Presto Player is active on your site.
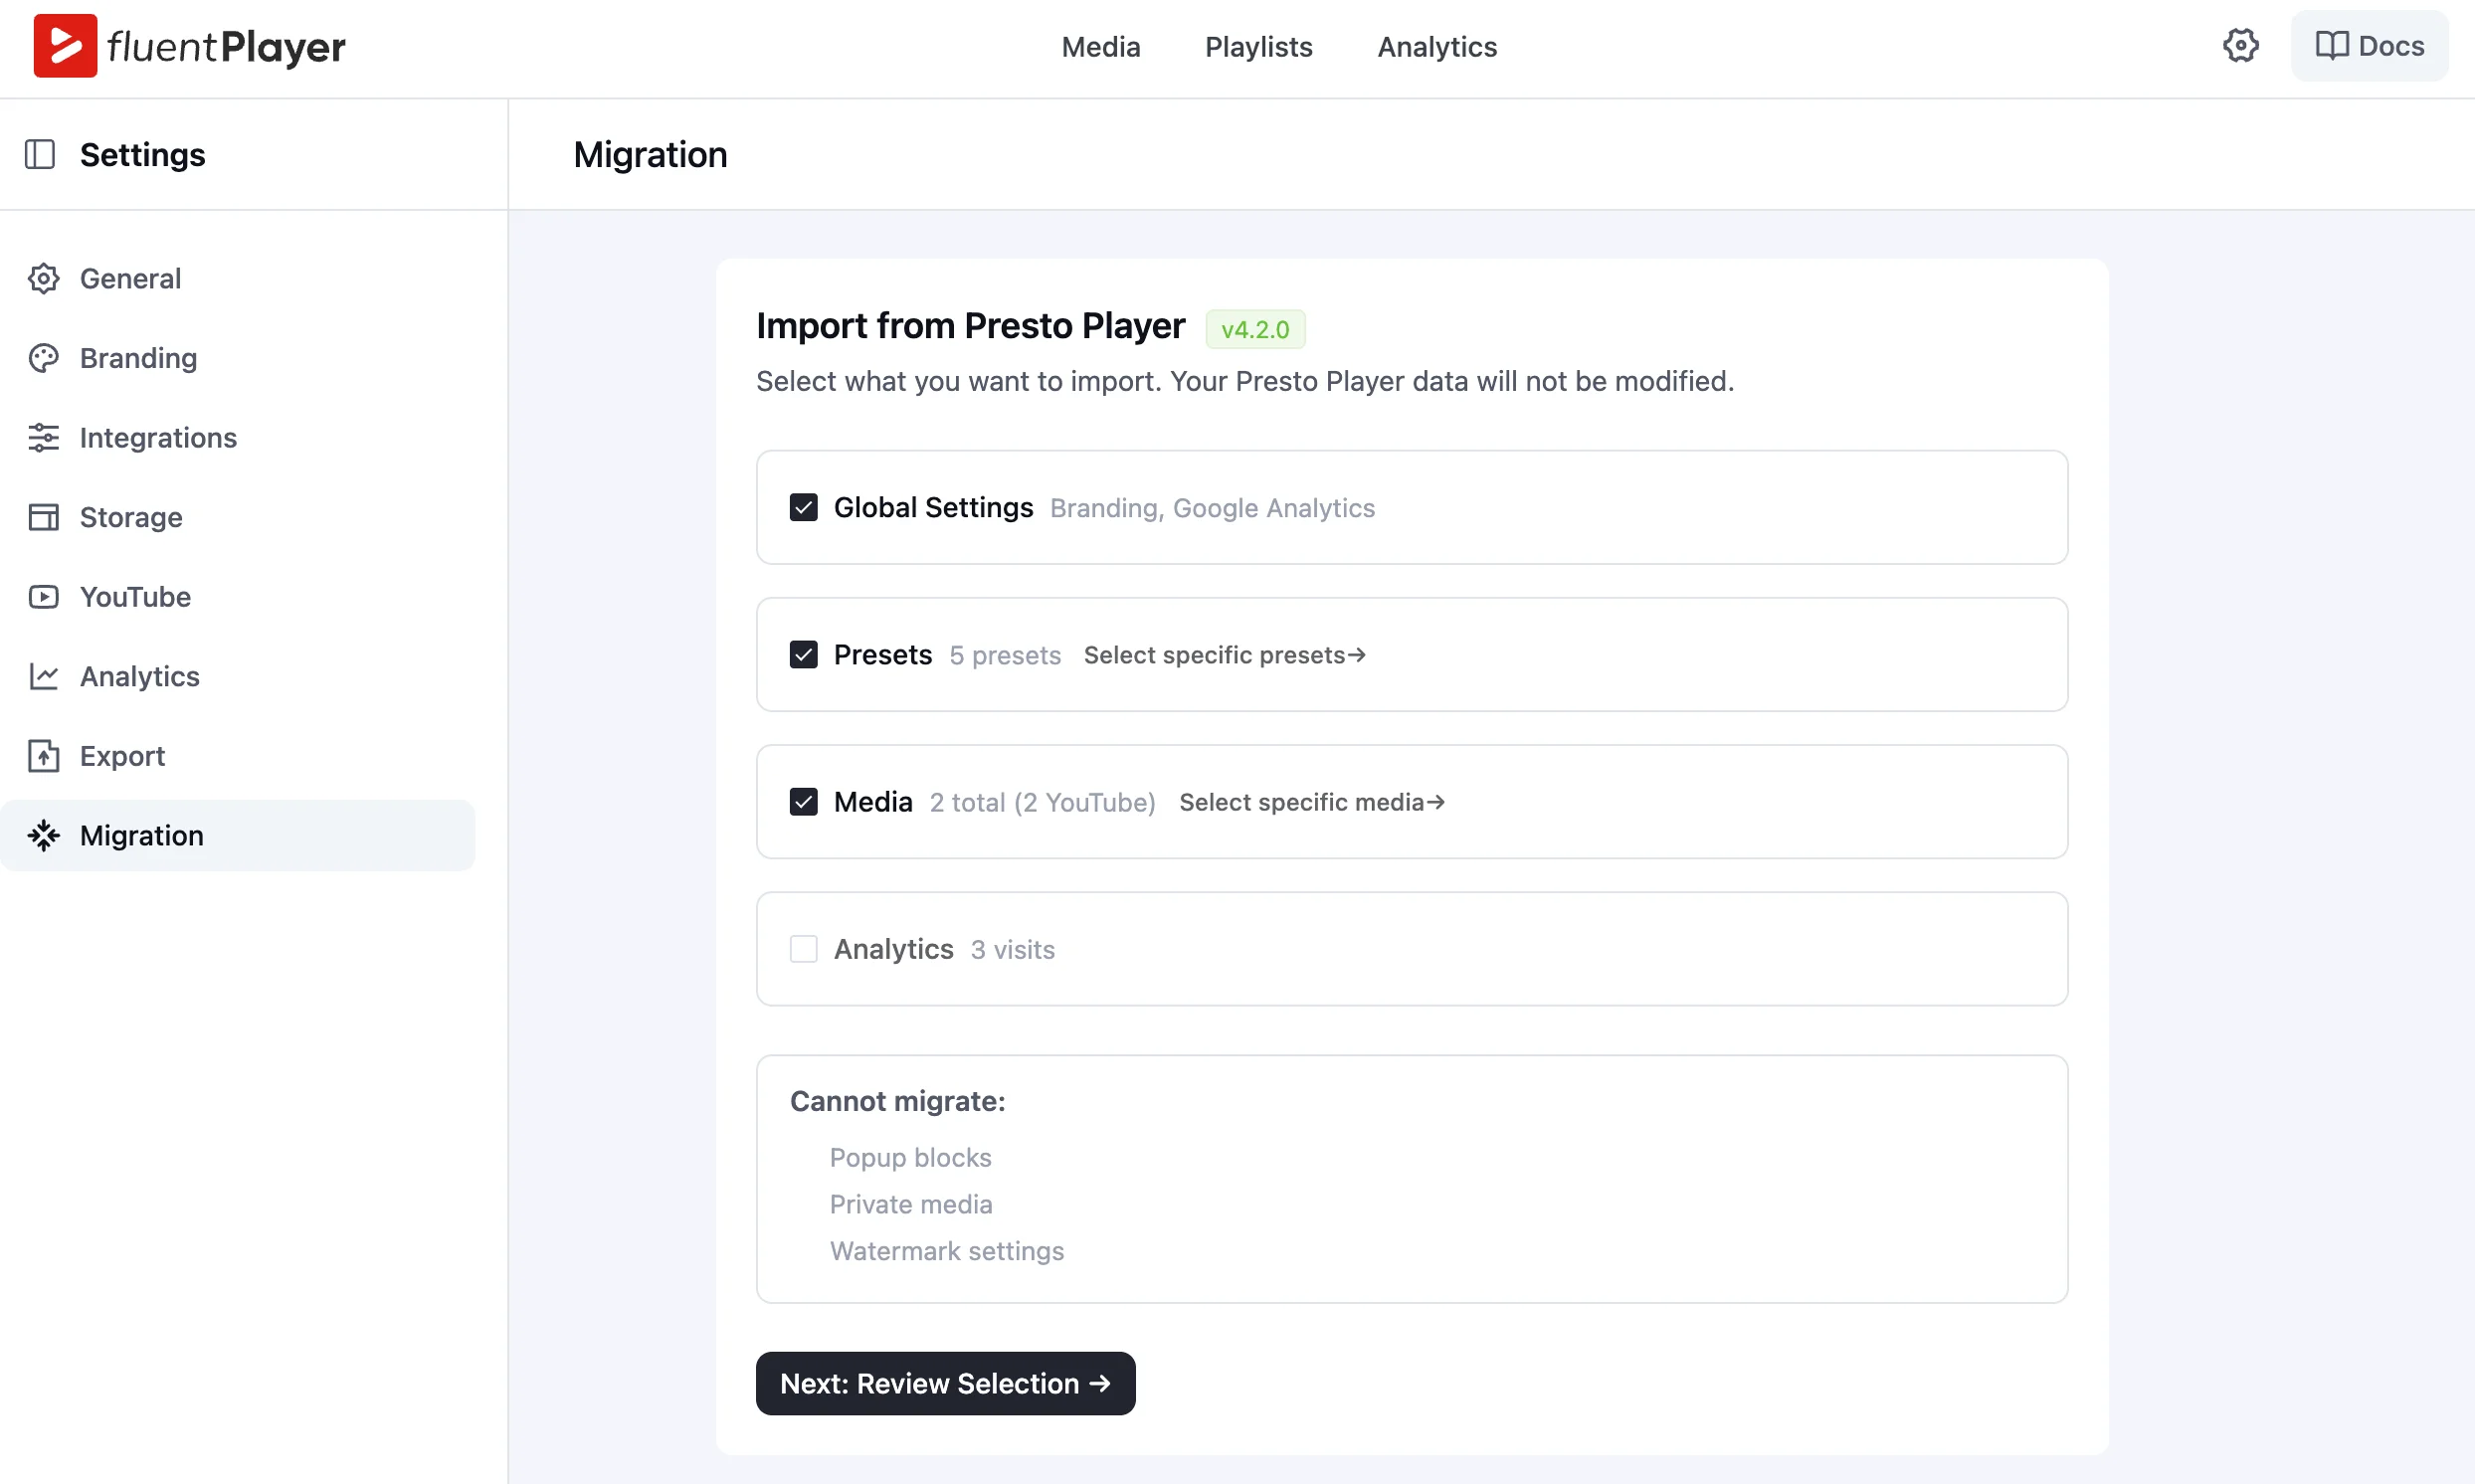
Step 3: Select what to import
You’ll see four checkboxes:
- Global Settings (checked by default)
- Presets (checked by default)
- Media (unchecked by default)
- Analytics (unchecked, locked until you select Media)
Check Media if you want your videos to transfer. Analytics becomes available automatically once Media is selected.
To choose specific presets, click Select specific presets. A modal opens listing all 5 presets from your Presto Player account. Check the ones you want, then click Done.
To choose specific media items, click Select specific media. Pick the individual items you want to bring over.
Step 4: Review your selection
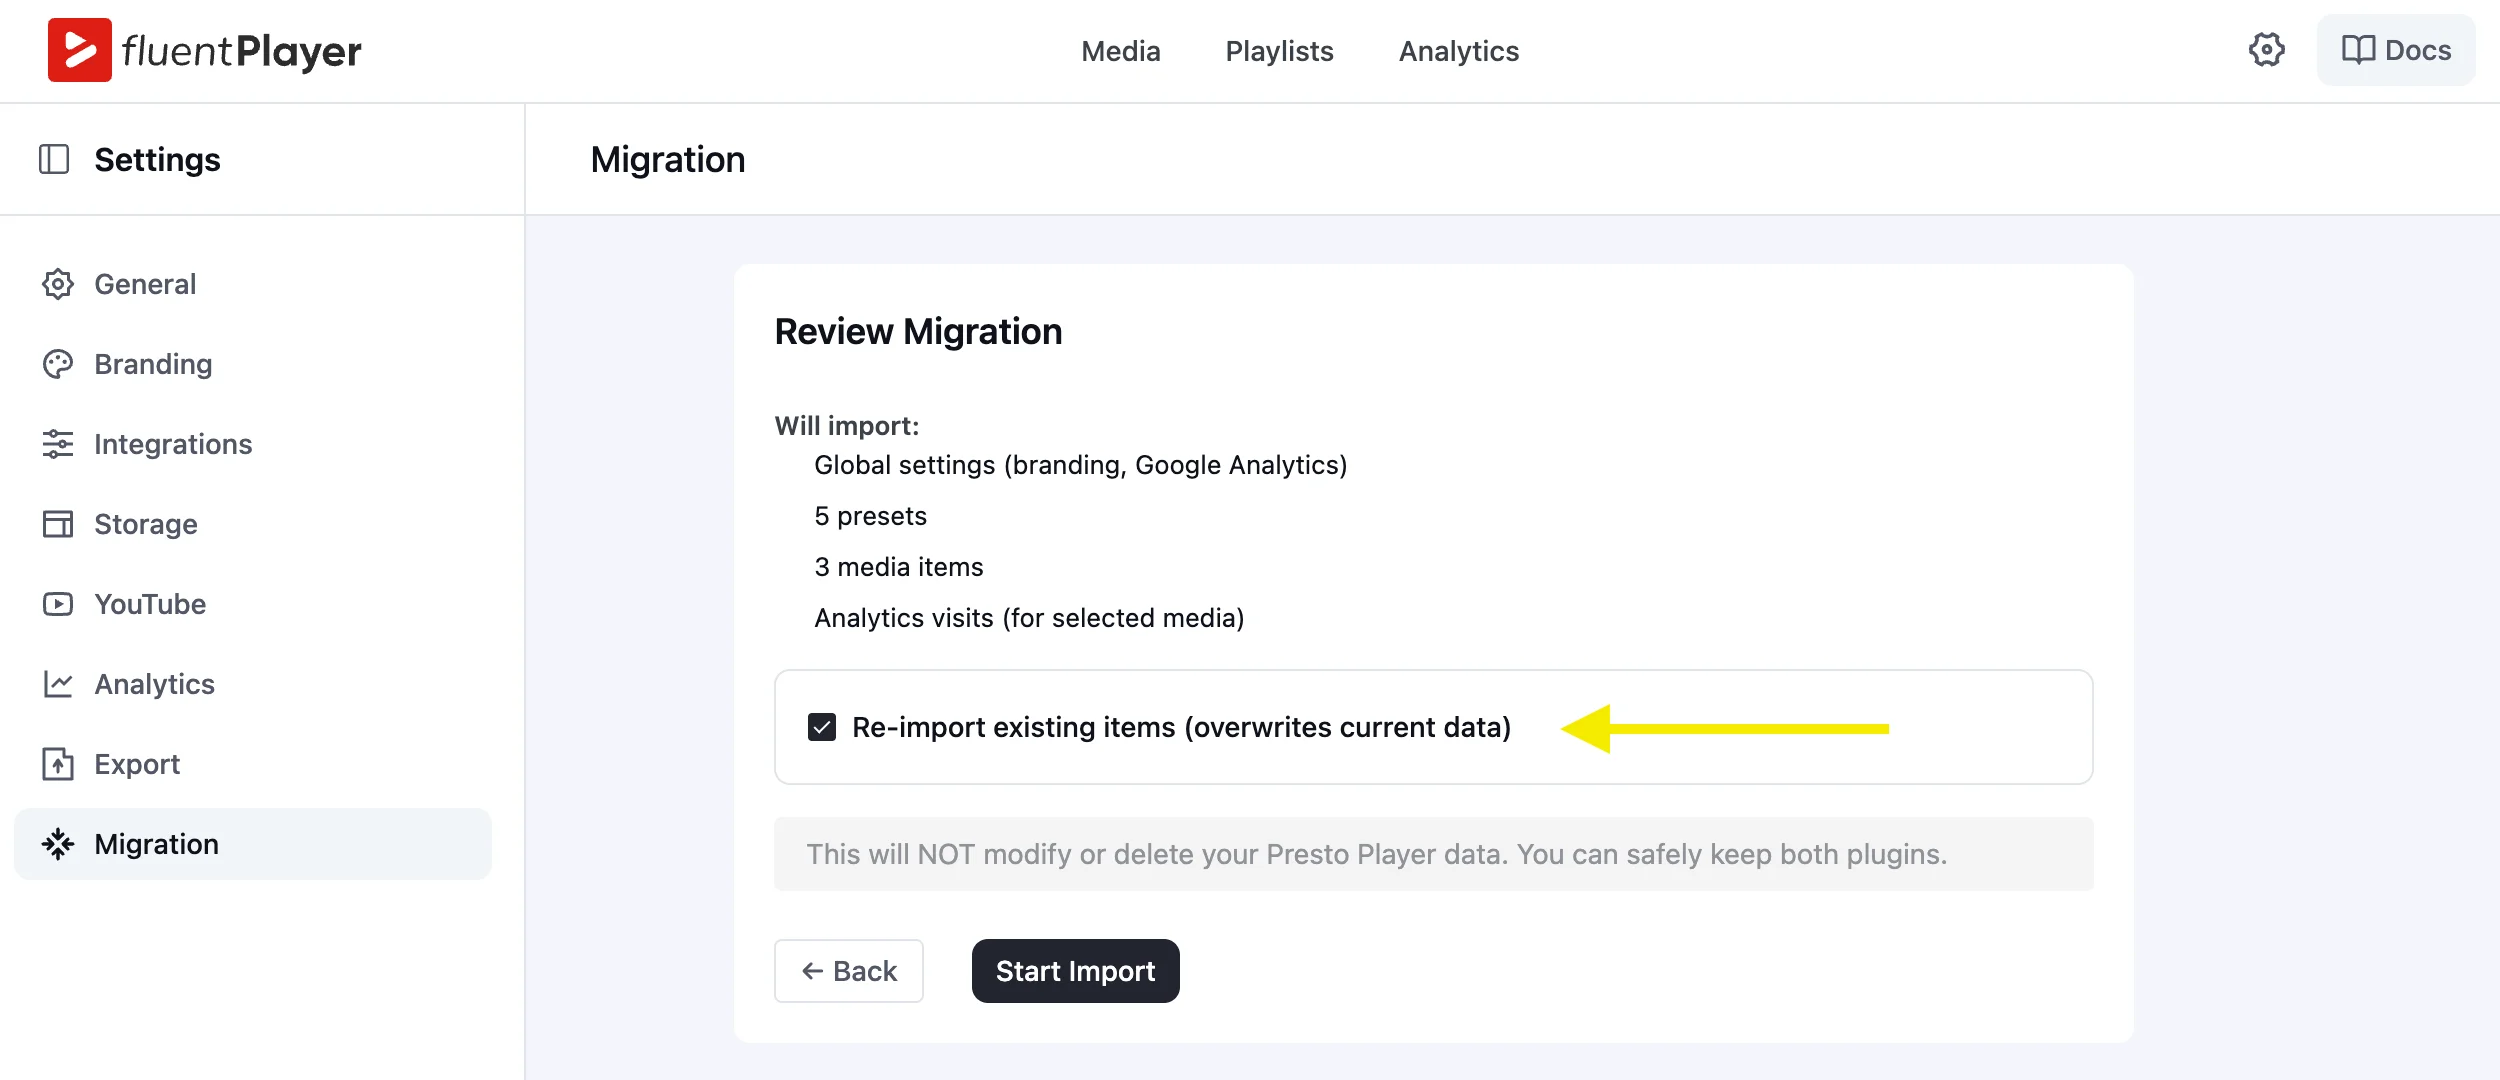
Clicking Next: Review Selection takes you to the Review Migration screen. It lists exactly what will be imported:
- Global settings (branding, Google Analytics)
- Number of presets selected
- Number of media items selected
- Analytics visits, if media was selected
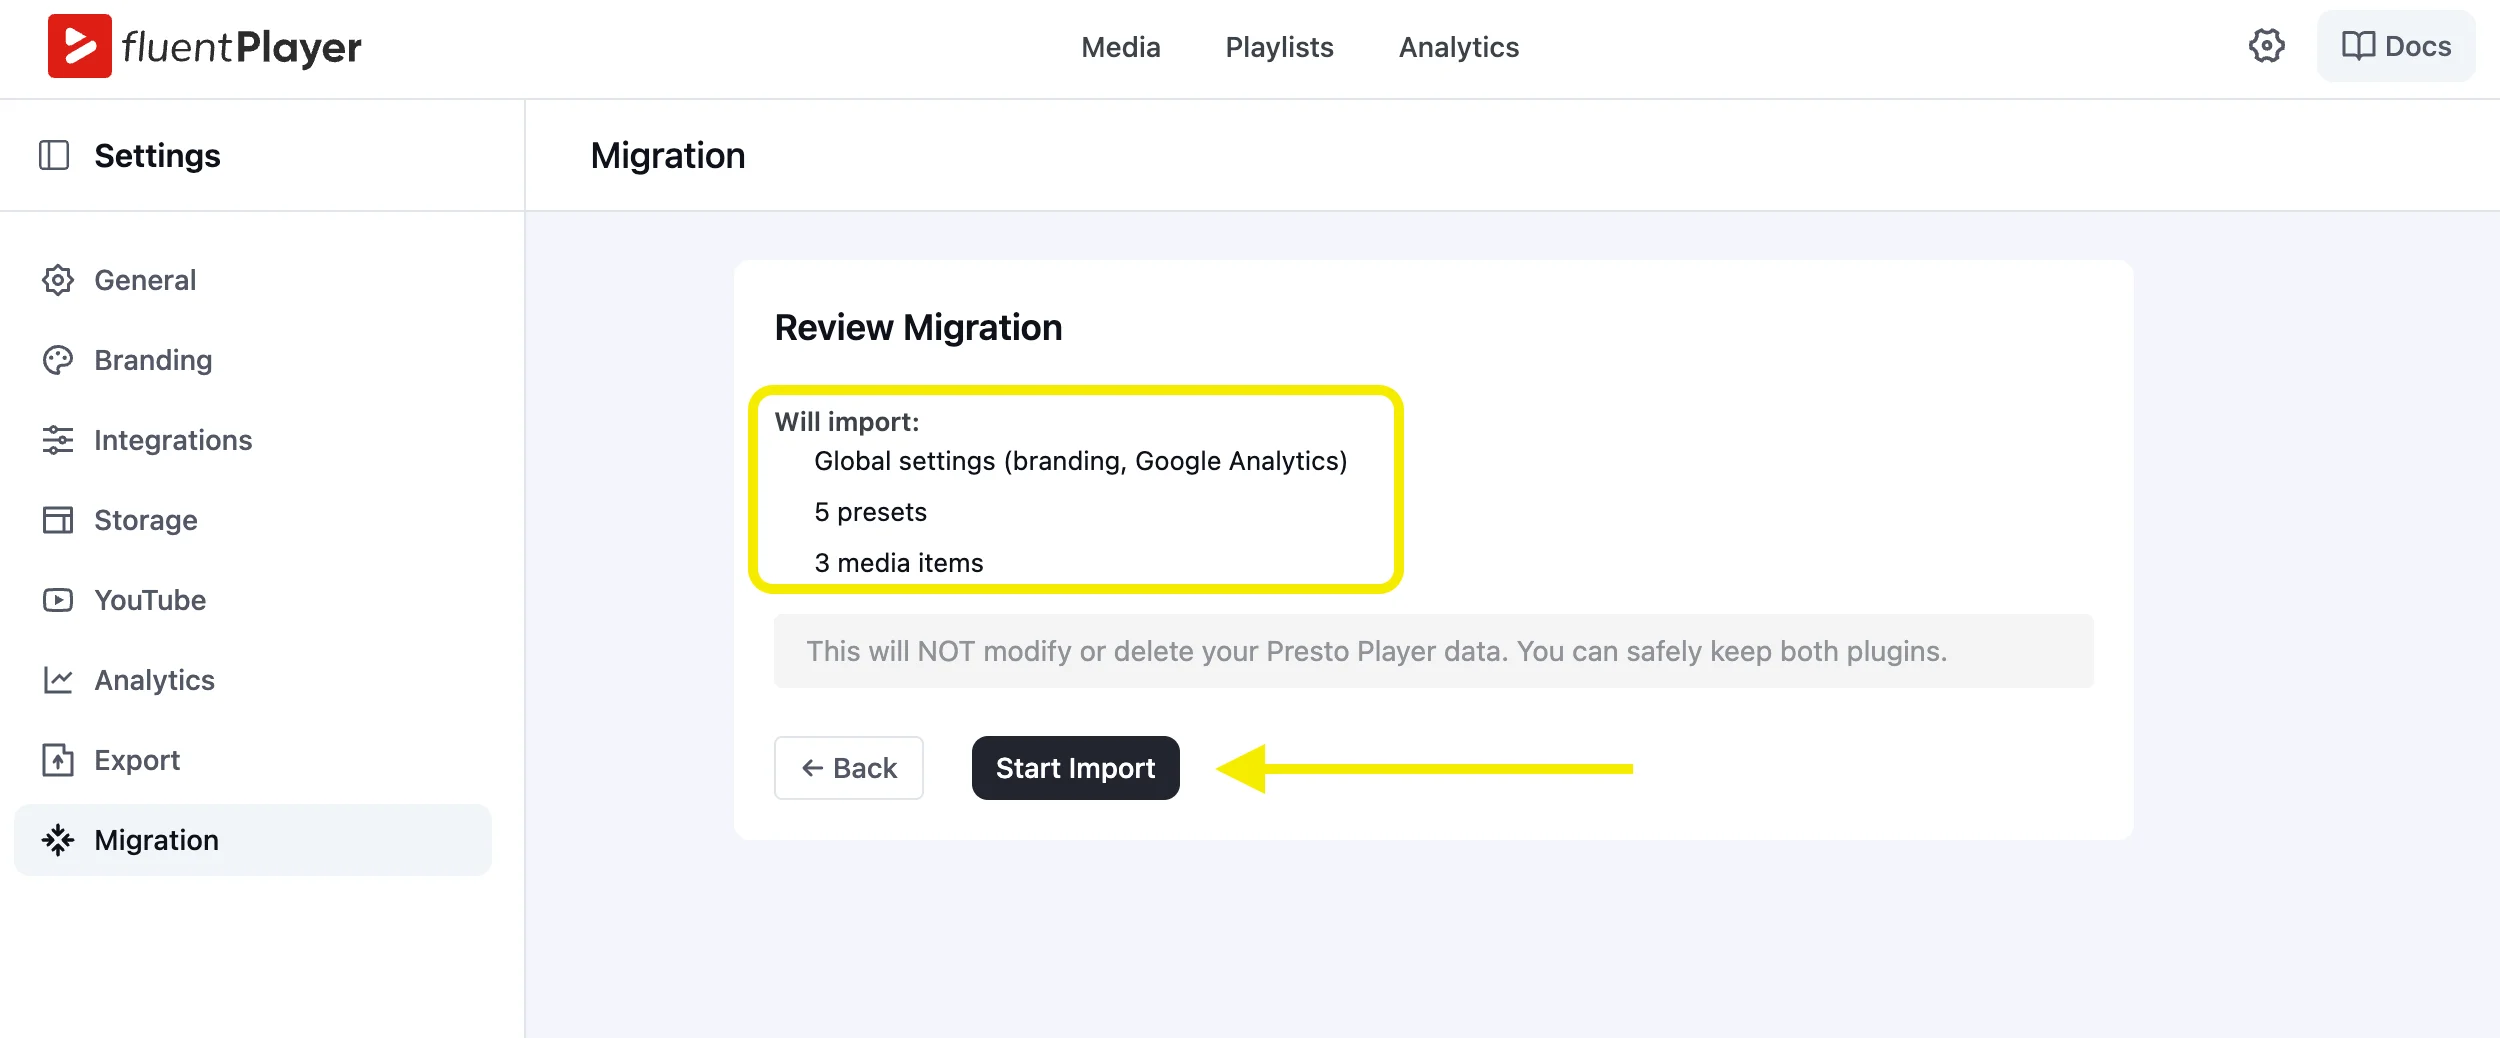
Read this screen before continuing. It is the last confirmation point before the import runs.
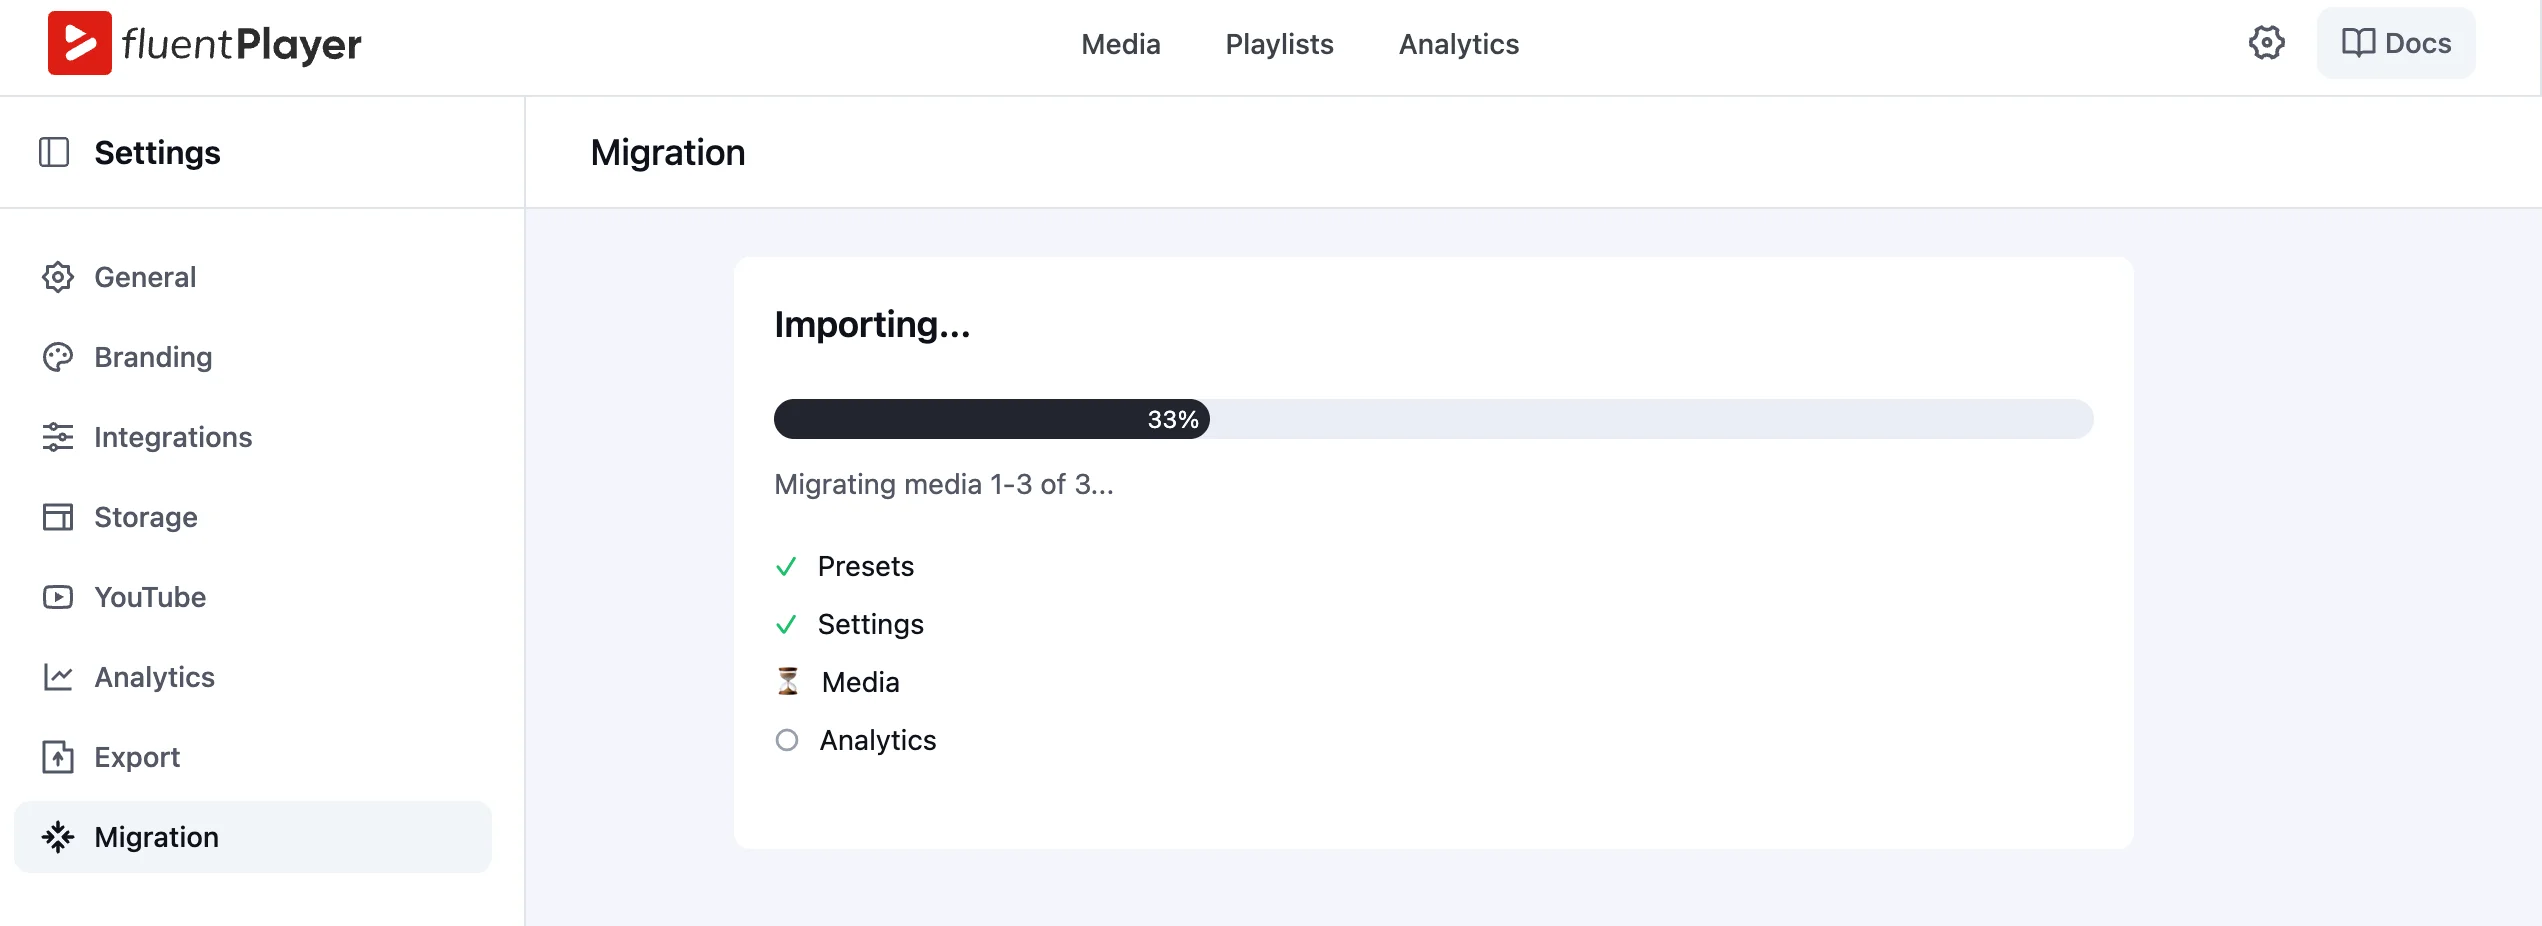
Step 5: Watch the import run
Click Start Import. The import runs in sequence:
- Presets
- Settings
- Media
A progress bar tracks completion. Each item checks off as it finishes. Do not close the browser tab while the import is running.
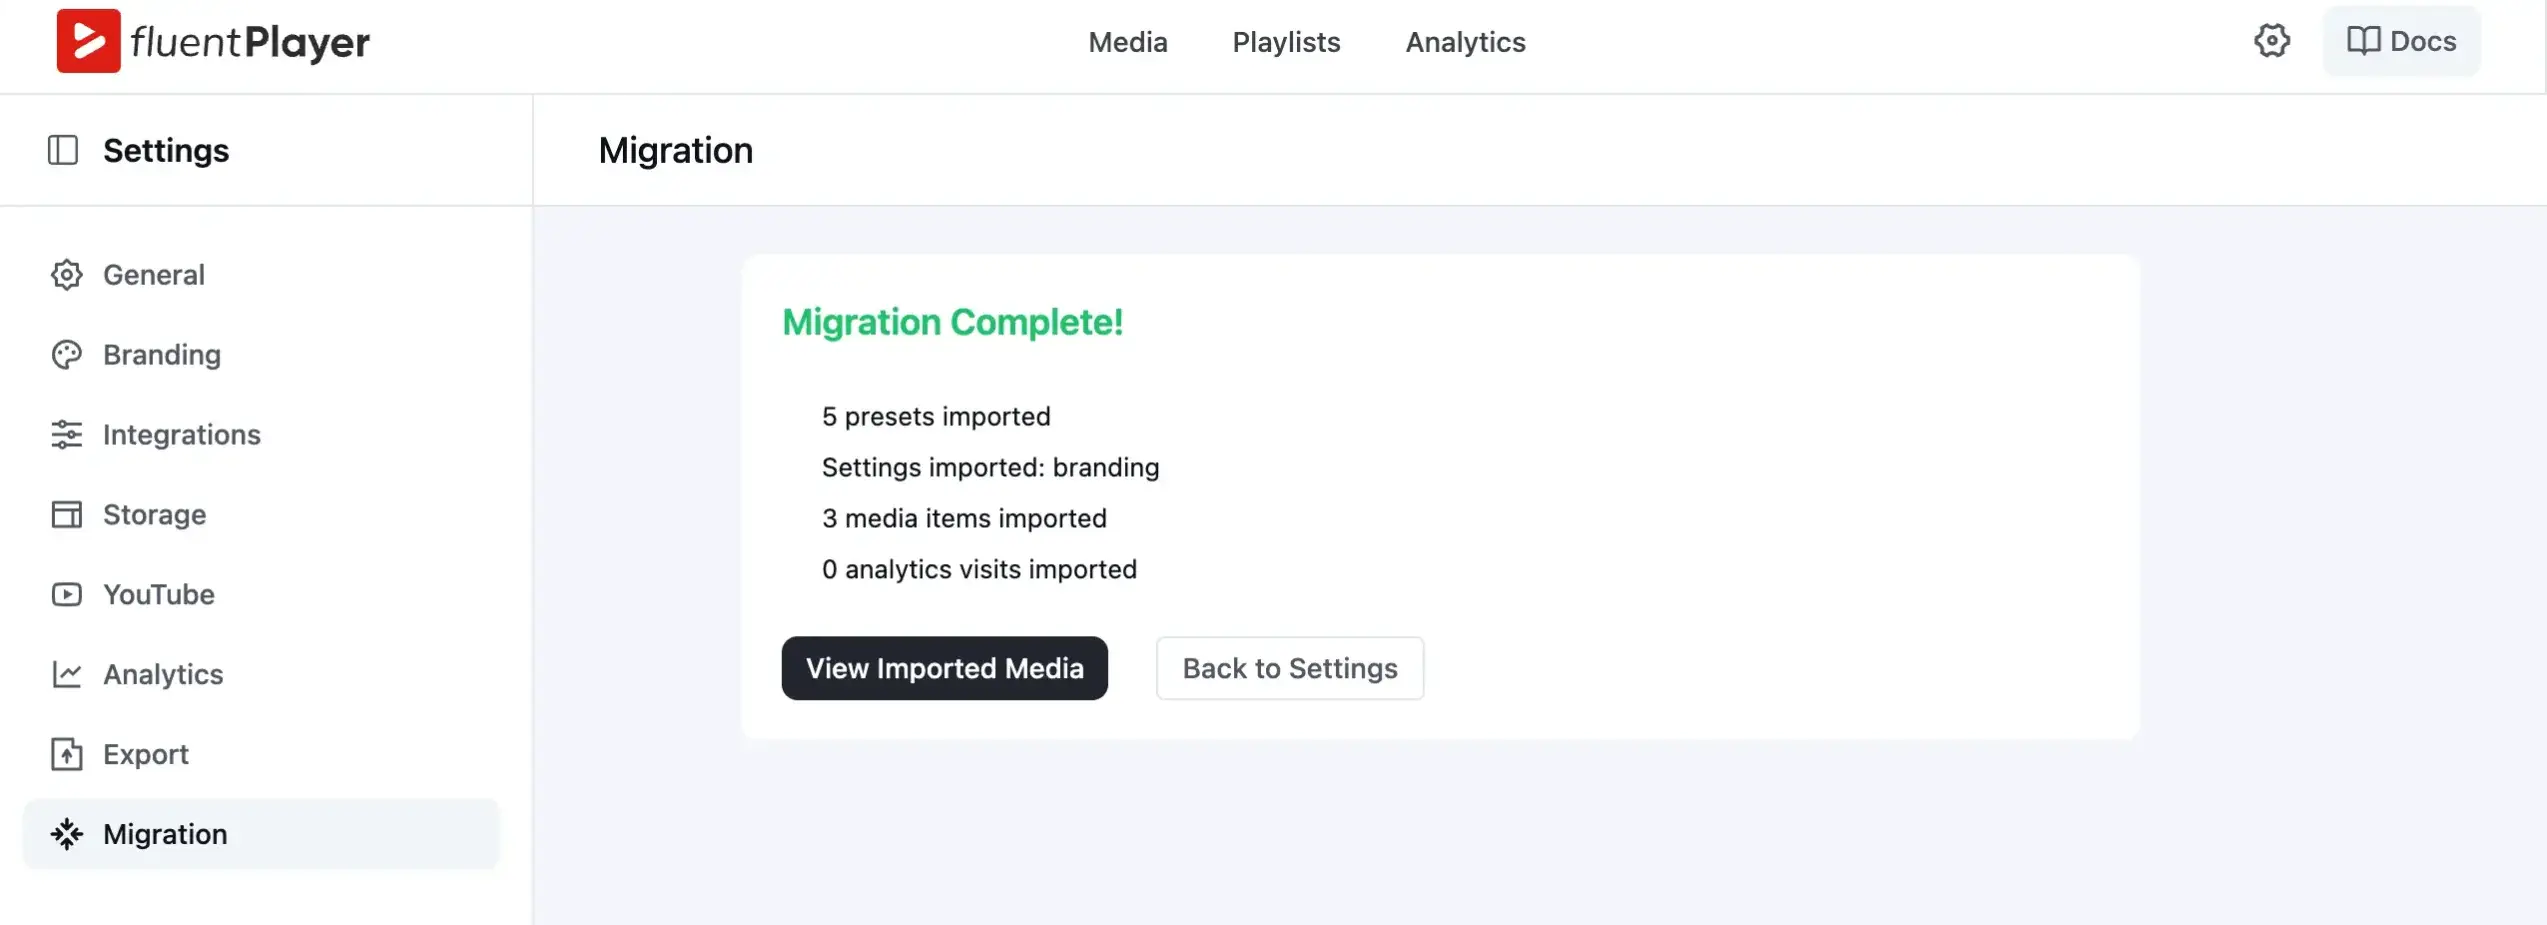
Step 6: Confirm the migration is complete
When the import finishes, you’ll see a Migration Complete! screen. It confirms everything that was transferred.
Two buttons appear at the bottom:
- View Imported Media — Takes you directly to your FluentPlayer media library
- Back to Settings — Returns you to the Migration tab with a full import summary
After the Migration: 3 Things to Check
Verify your presets carried over
Go to your FluentPlayer media library and open any video. Check the player preset dropdown. Your imported presets (Default, Course, Simple, Minimal, Youtube Optimized) should appear as available options.
If a preset is missing, run the migration again with only that preset selected.
Check your media library
Click Media in the top FluentPlayer navigation bar. Every imported video should appear here with its original title and source intact. YouTube videos imported from Presto Player show as YouTube media items inside FluentPlayer.
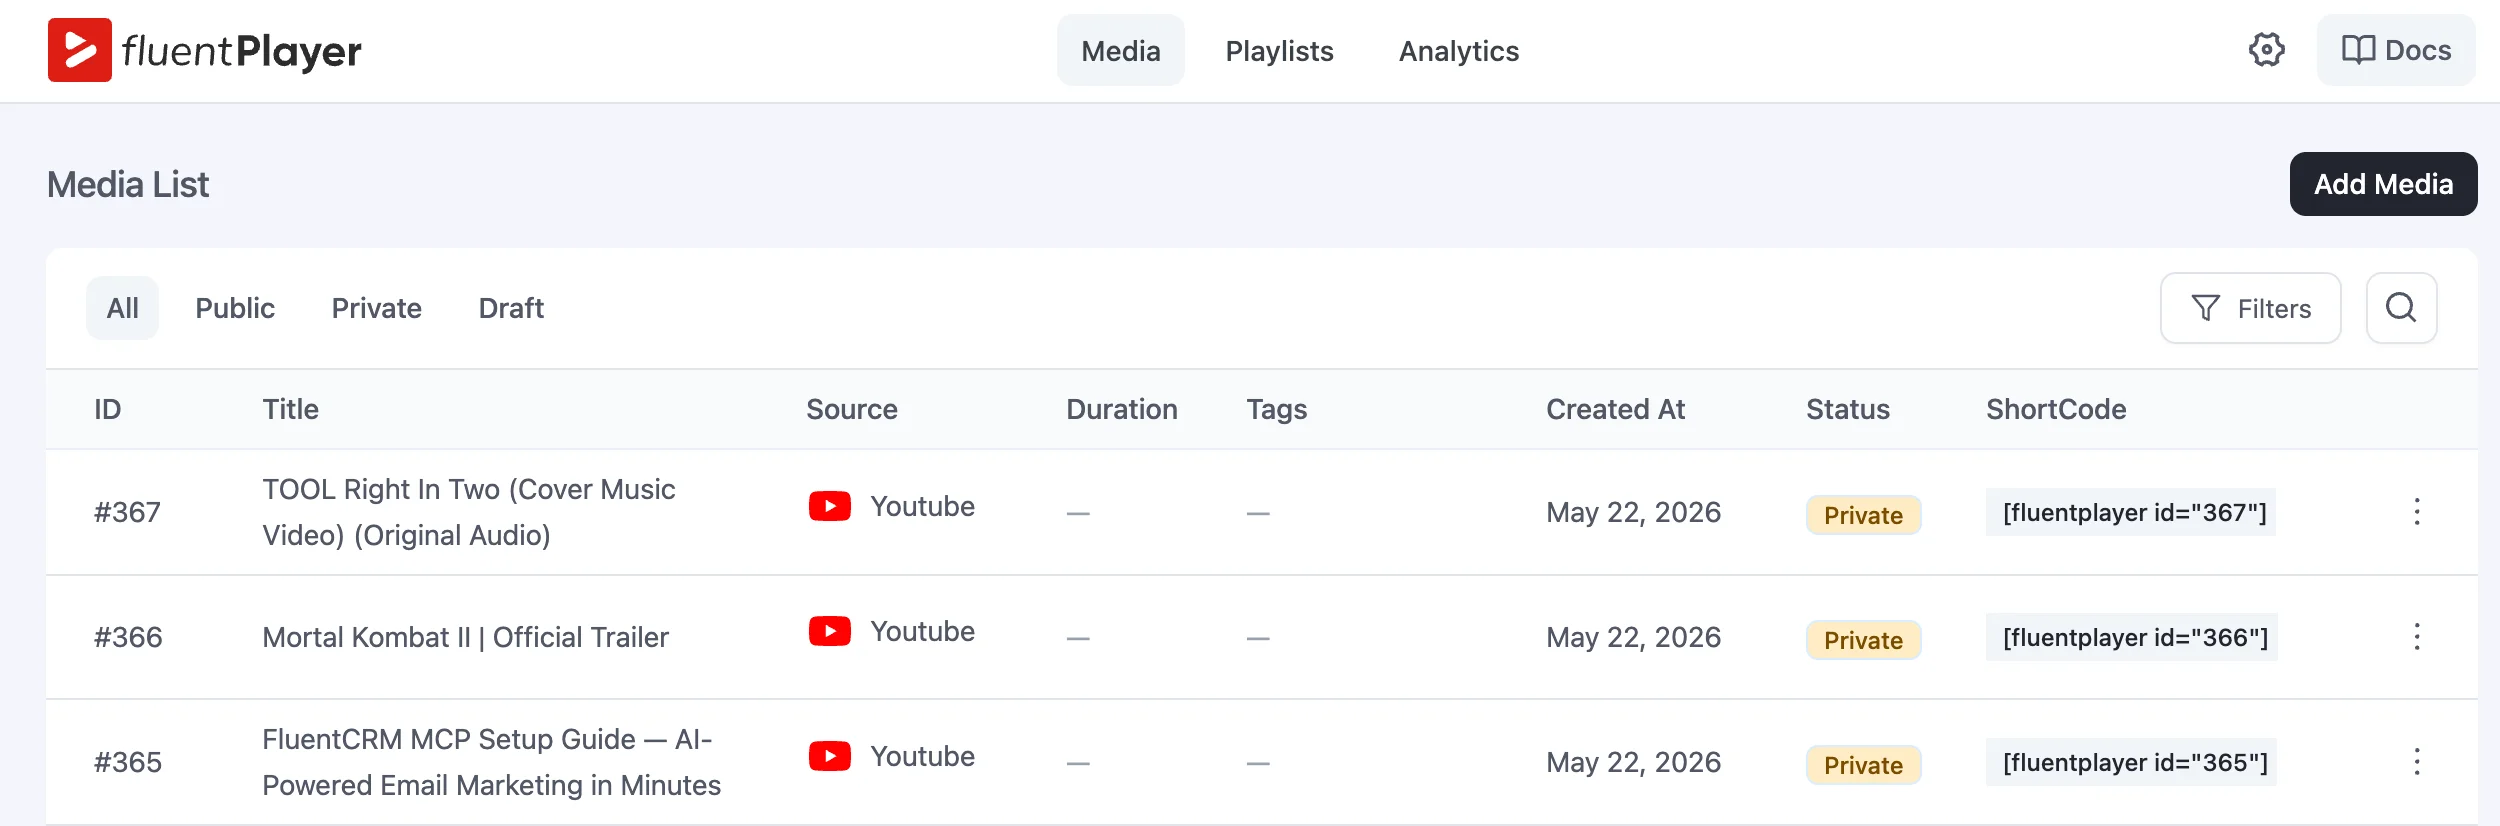
If a video is missing, run the migration again and use Select specific media to target that item directly.
Confirm branding settings transferred
Go to Settings > Branding inside FluentPlayer. Your logo and brand color from Presto Player should be there.
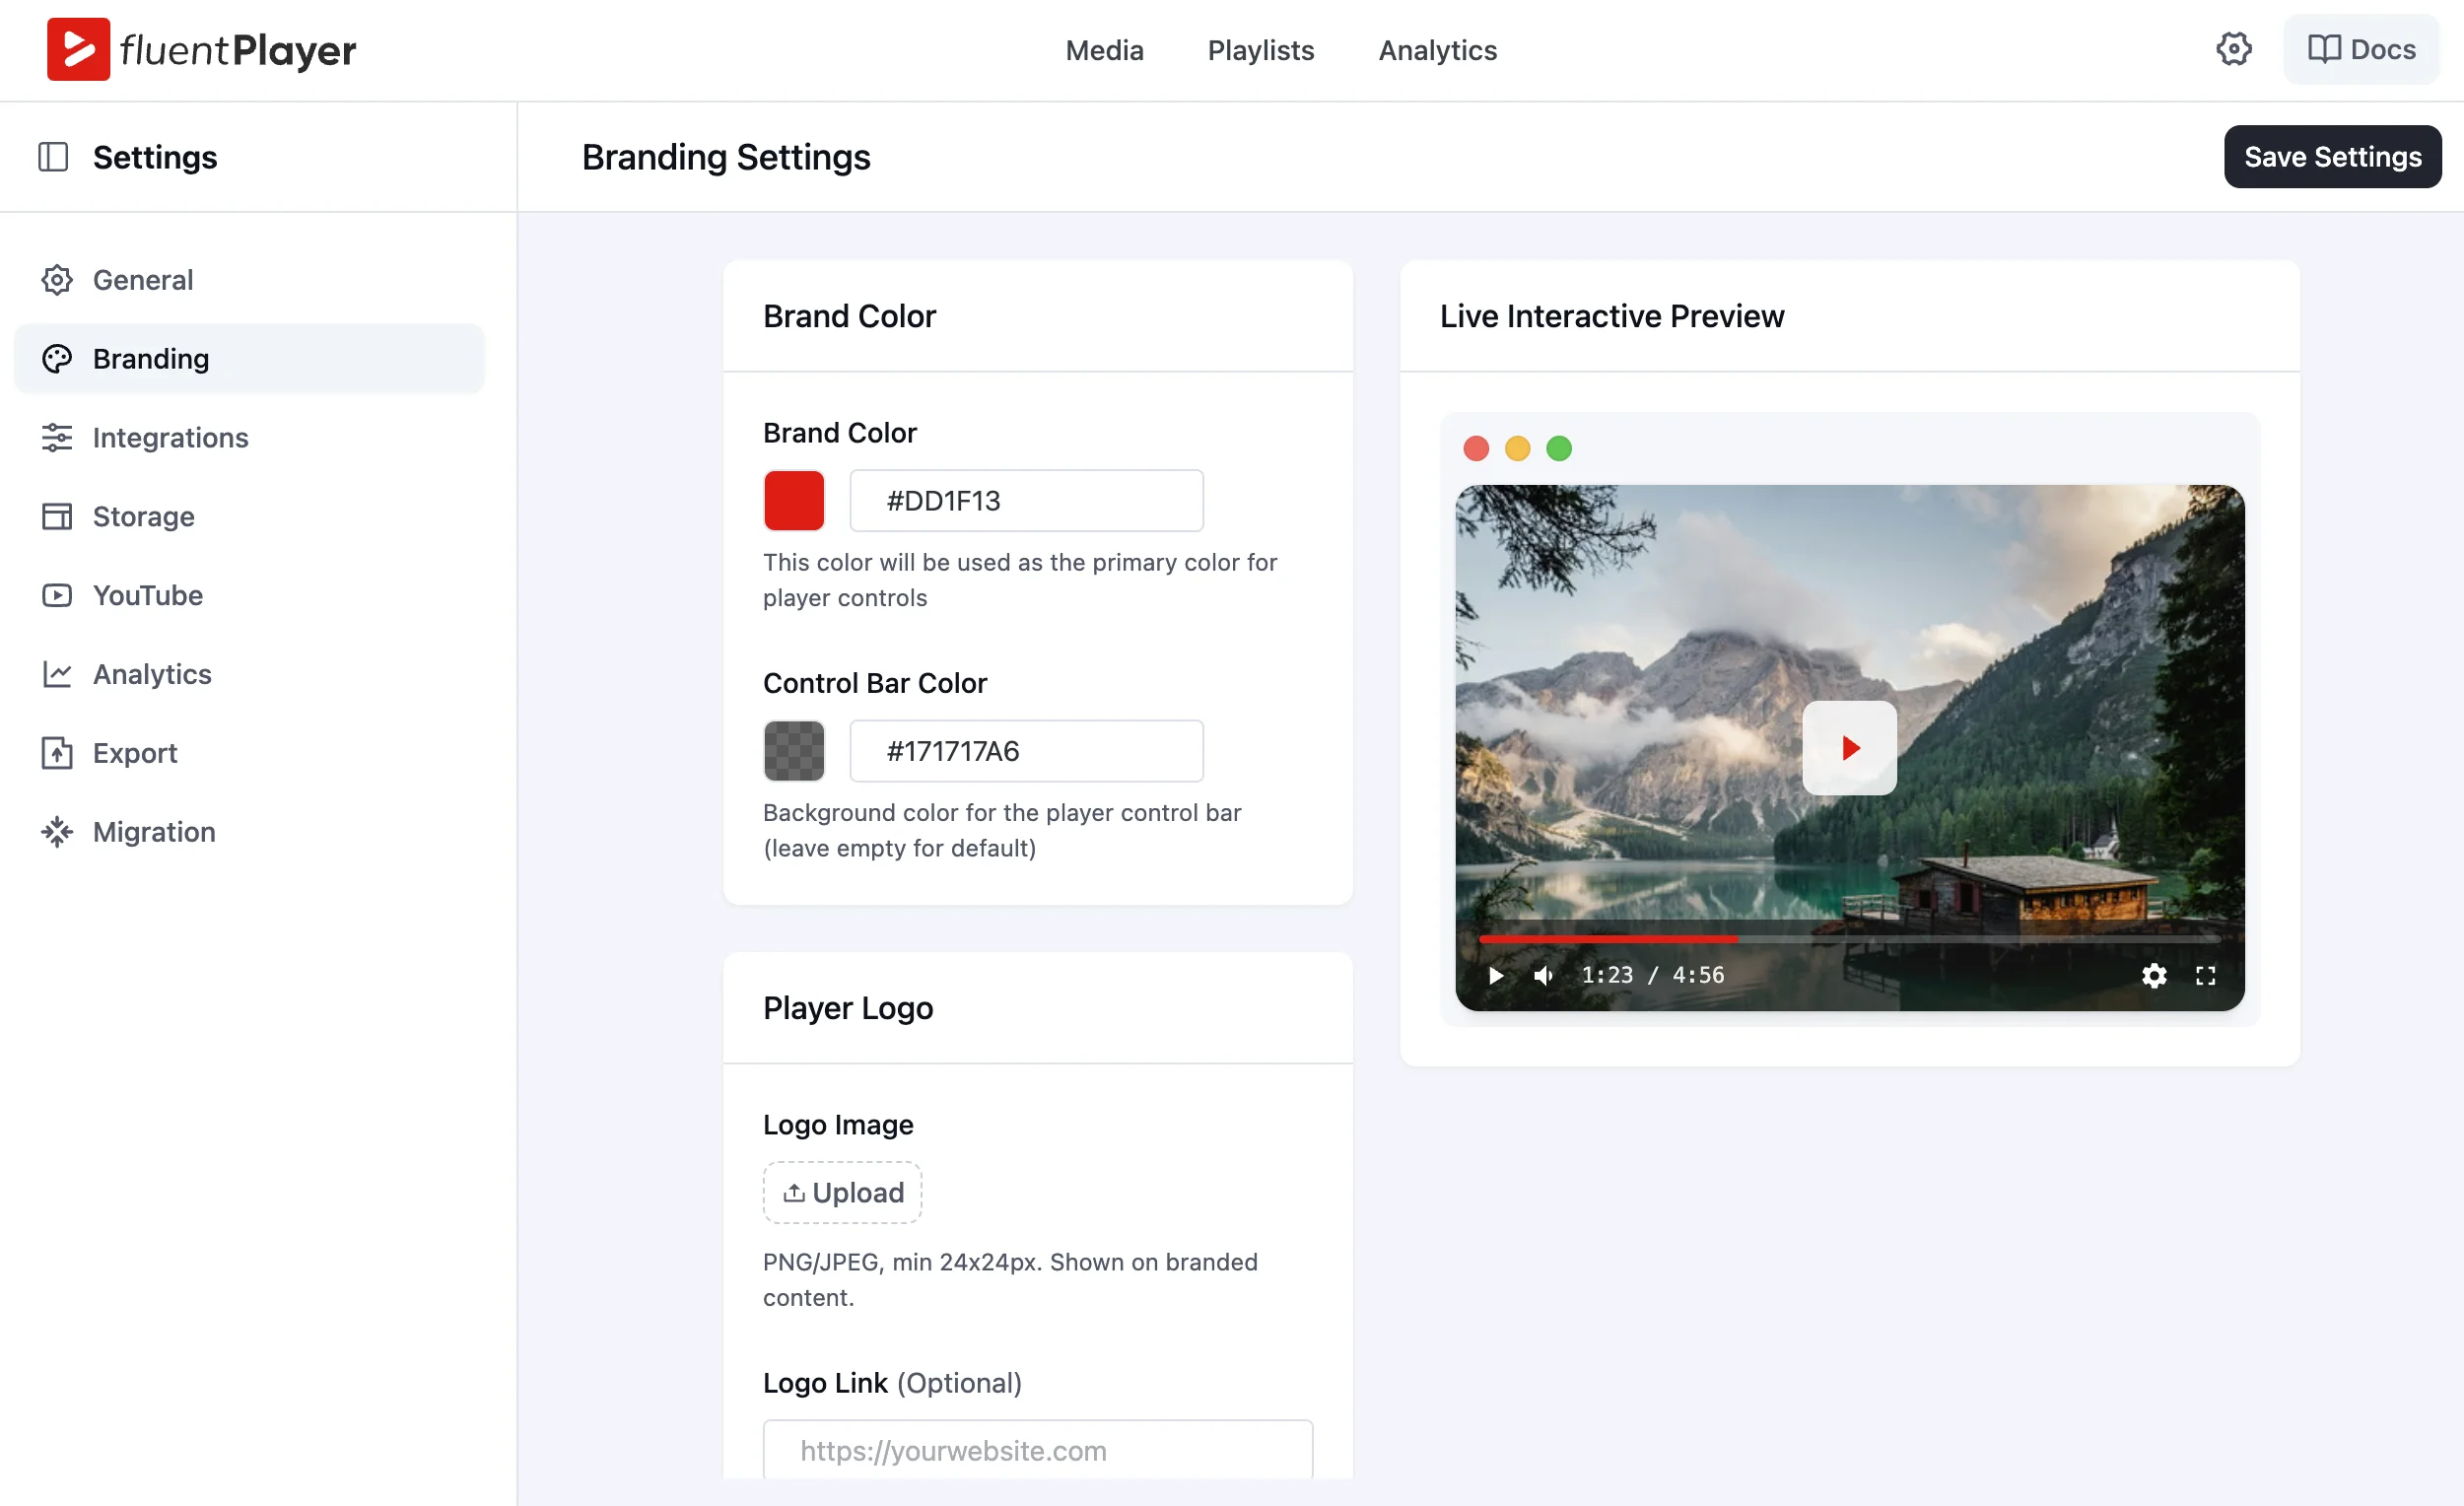
If the branding screen is empty, go back to Migration and run it again with Global Settings selected.
Running the Migration Again
What “Run Again” actually does
After a completed migration, the Migration tab shows a Previously Imported from Presto Player summary with a Run Again button. Clicking it takes you back to the Review Migration screen, the same screen you saw on the first run.

The overwrite checkbox: read this before you click
The Review Migration screen on a second run includes one addition: a checkbox labeled Re-import existing items (overwrites current data). It is checked by default.
If you run with that box checked, your previously imported presets and media get replaced. Uncheck it before clicking Start Import if you want to add new items without replacing what’s already in FluentPlayer.
FluentPlayer: Better control over videos
What to Do with Items That Didn’t Migrate
Popup blocks
Popup blocks from Presto Player do not transfer. You’ll need to recreate them inside FluentPlayer using the interactive layers feature.
FluentPlayer supports these as built-in interactive options:
- CTA banners
- Hotspots
- Ad overlays
- Shortcode layers
Private media
Private media cannot be migrated. There is no workaround from WPManageNinja’s side right now. Your private Presto Player videos need to be re-uploaded manually inside FluentPlayer and reconfigured with the appropriate access settings from scratch.
Watermark settings
Watermark settings do not transfer. After migration, go to Settings > Branding inside FluentPlayer and recreate your watermark configuration there. Position, opacity, and logo all need to be set up again.
The Migration Takes Under 5 Minutes. Your Presto Player Setup Stays Intact.
You can install FluentPlayer today and run the migration without touching your Presto Player setup. Both plugins run on the same site without conflicts. If something doesn’t carry over, you already know what it is and why before you start.
If you’re ready to try it, install FluentPlayer, open Settings > Migration, and run your first import. Join the waitlist and get early access at fluentplayer.com.

This is Sumit. He’s a physics major who’s trying to understand both the physical as well as the WordPress worlds. Whenever he’s not busy, plays fifa or spends time with his family.
Leave a Reply